Realtime Visuals Vs Pre-Rendered: How Close Can I Get?
OK, before I begin this, I should mention one very important salient fact: this comparison is specific to one non-photorealistic project.
As mentioned a couple of days ago, I’m looking once again at using realtime engines as movie renderers for my Stone And Sorcery project. That’s a non-photorealistic animated series, using a strong voxel / Minecraft aesthetic. As such, I wondered just how close I could get to the visuals I achieved using a conventional path tracer.
The answer turns out to be “very close, but not without some pain and swearing”.
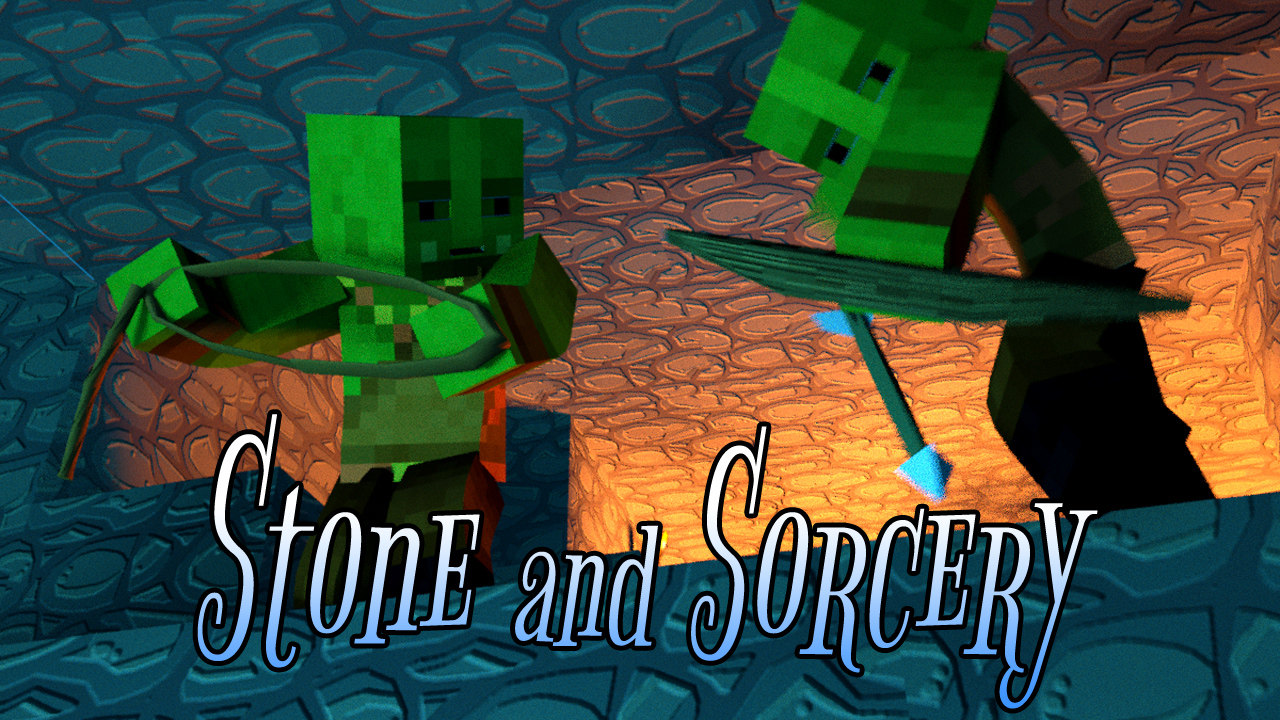
Here’s the original image I’m trying to copy, from the Stone And Sorcery ads I put out last year. It was rendered in about 4 seconds using 3DSMax - fast for a path tracer, but that still gives us a render time of 8 hours or so for each camera angle of a 5-minute short.
The Progression
So I got started, using Unity 5.
Unity 5 boasts realtime global illumination, using the Enlighten engine, but it’s only realtime at the user’s end. It requires a precomputation step on the part of the creator. Somewhat nervously, I hit the button to start the precomp - but it turns out that on a set this small, it’s really quick. About a second or so.
(That was significantly less true on a large Minecraft export I tried as an earlier test: the calculation crashed out hard with what I believe is an out-of-memory error. )
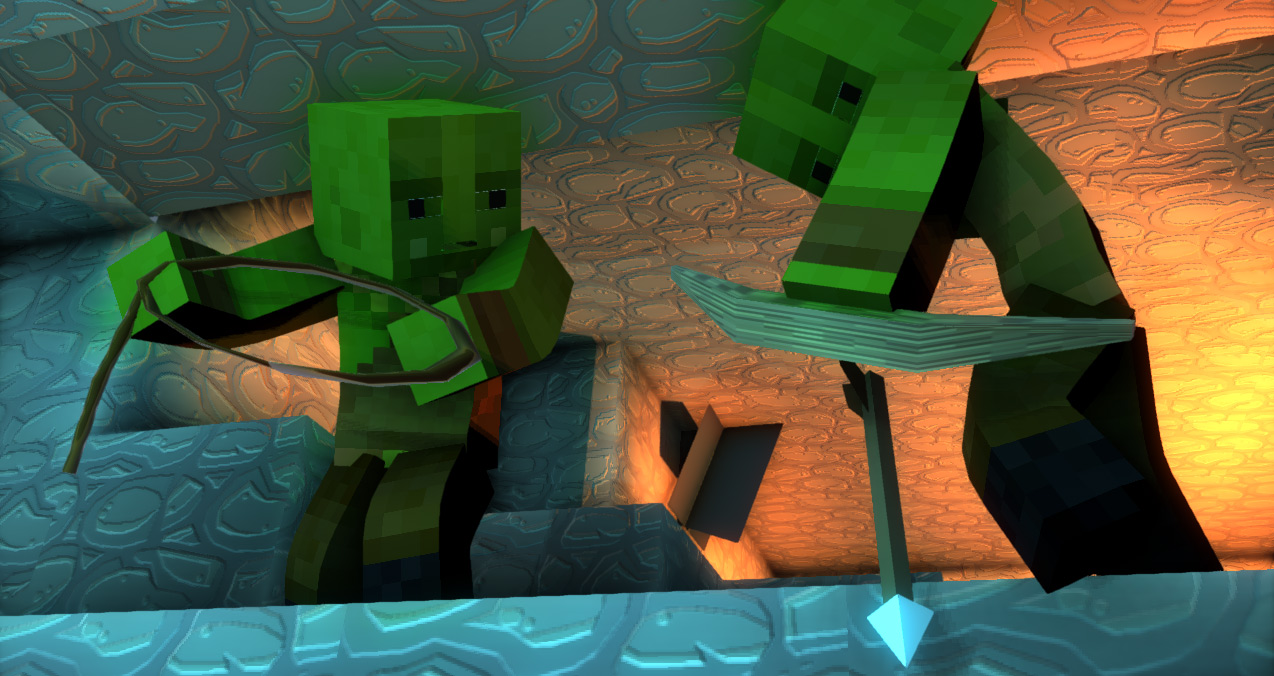
So I had basic GI, I remembered roughly the lighting setup I’d used, I dug around to find the right textures and normal map (the latter being responsible for the fine detail on the geometry you can see above - amazingly in 2016 Unity still doesn’t have displacement maps by default), and I dropped in some “make it pretty” functions that I assumed would equate to the path tracer’s output - bloom, SonicEther’s very nice ambient occlusion plugin, and depth of field.

Well, it looks kinda nice, but it’s clearly not the same. The depth of field looks horrible, the normal maps are jagged, I’ve lost the textures on the bow, and the lighting’s wrong.
Dropping the depth of field like a hot rock - one thing I’ll need to do if I keep up this approach is to either abandon depth of field as a cinematic tool or find a much better shader for it -I get this. Immediately significantly better, but still not there.
So I went back to the original path-tracing model in Max, and took a careful look at what was going on.
For starters, there was some geometry missing in the FBX file I imported - that’s what was responsible for the line behind the characters’ heads in the original. Expecting the fix to be a complete nightmare, I tried the simplest thing I could think of - create a cube, texture it with the ceiling texture, put it in place, all in Unity. Astonishingly, it worked, and matching the texture scales turned out not to be the bear I was anticipating.
Next, the normal maps looked horrible. You can see that at the bottom of the above image, the geometry’s all pixelated. This frustrated me for a good long while - I managed to track down the fact that I’d got two normal maps on the single texture by mistake, but still, the maps came out pixelated.
Finally, I dived into Unity’s texture detail settings, and found the problem. The original normal maps are extremely high resolution - more than 8k pixels wide. However, Unity is designed for games, which generally don’t like images that large (particularly on an iPhone), and so it resizes them by default, and then applies some lossy compression. That’s fine if you’re not seeing the texture close-up (look at the ceiling), but it’s an image-destroyer for something which occupies a quarter of the screen.
I killed every compression, filtering, and size-reduction setting I could see, and the normals returned to close to the quality we see in the path tracer.
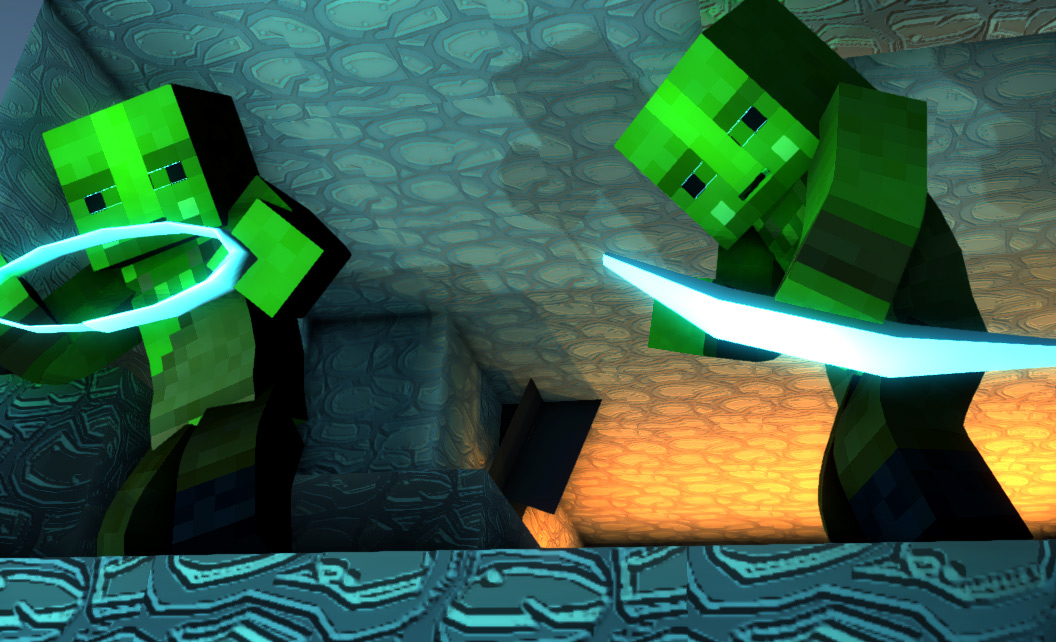
Then I just straight-up copied the light colours and placements from the path tracing file, and dropped them in. And I took considerably more care over the exact frame of animation I used…

And I think we can all agree, it ended up looking like dogshit on toast.
Up until now, I was starting to think that there was very little difference between the lighting quality in Unity and in MAX, at least for this scene. However, now I hit the big caveat to that theory: Unity can look great, but its lighting absolutely does not behave like a path tracer.
The lighting settings for the light at the back produced very different colours, for no reason I fully understand. The light also bounced differently, partially because Unity 5’s standard shader is a PBR (Physically Based Renderer) shader with completely different settings to the normal diffuse/specular/normal shader in MAX. You can see in the above image that the ceiling is quite shiny, almost plastic-looking.
I couldn’t copy the shader settings, so I tweaked the Unity shader to look a bit better.
Another huge issue: whilst in MAX lights can be of an arbitrary size, in Unity the real-time lighting all comes from point sources - sources that are infinitely small. Before last year’s journey through the world of Real Film I didn’t fully realise the key difference between small sources and large: larger sources produce completely different, much softer shadows.
I had to fake the effect by adding 3 point lights rather than one at the back. At this point the “faking it” and complexity of game lighting was starting to show through: whilst game lighting might be faster, it’s often the case that you need to spend a lot more time working around its limitations than when you’re working with a path tracer, which will simply render light exactly as it works in the real world.
Finally, I had the lighting at the front of the image to contend with. In the path tracer, it’s down the bottom of the pit the goblins are looking into: thanks to the magic of inverse-square law, it illuminates the edge more than the ceiling. In Unity, I found, the reverse was true - possibly because I’d not set the shader up correctly, or possibly because of a limitation of the more simple lighting model. I ended up having to move the light closer in order to make the ceiling darker and the edge lighter - something that makes no sense, but clearly worked with the lighting model in Unity.
And thus we end up with the final version:
For comparison, here’s the original path-traced image again:
Obviously the lighting’s not precisely right - there’s a bit more contrast in the original. The angle’s slightly different too.
But it’s pretty close.
Showing the two images to some friends, Johnnie Ingram pointed out something very interesting. Due to the nature of the two renderers, the edges in the Unity render are much sharper than those in the path-traced renderer. He felt that a “normal” person who didn’t know the origin of the two images would think that the Unity render was thus higher quality. It’ll be interesting to test!
The ambient occlusion effect works nicely in the Unity version to add additional shadow and detail. The only issue there is the green halo around the left-side character’s head - apparently the SSAO algorithm used in that particular shader still has trouble identifying objects that are seperate from the background. I know the NVidia HBAO algorithm has less trouble with that - although it has problems of its own - so I’ll probably try a variant of that one next.
Overall, as a proof of concept this looks pretty solid. Next step is to render the second episode of Stone And Sorcery with Unity and see how it holds up - coming soon!
*If you want to let me know what you think, feel free to give me a shout on Twitter or Facebook - or join the discussions on Reddit or Hacker News. Links will be added once I’ve set those up!